Thursday, 24 December 2015

Aqua Art's Day

Today is one of the important day in this semester of this subject which we doing our final project "Aqua Art's Day"

In this project , each group must make their own accesories with aquatic plant for an example put aquatic plant on the paper to make a bookmark, use aquatic plant to make a frame , aquascape , food and many more. 

The accesories that we sell in Aqua Art's Day :

  1. Bookmark (Hydrilla  sp.  ,   Pistia sp.  etc )
  2. Frame of freshwater macrophytes
  3. Aquascape
  4. Food (Latok with umai) - A traditional food from Sabah and Sarawak

After we done selling, we take one sample of each group and promote it to the lectures and staff of Department of Aquaculture.

PIcture 1 : With our lecture Dr.Natrah


Visiting Aquascape Paradise at Shah Alam

Our next activity of this semester is visiting Aquascape Paradise at Shah Alam.

Aquascape Paradise is established at 29 November 2014

Before we start touring the shop, the instructor who giving us a briefing about the Aquascape Paradise first is Mr. Mohd Izzat. He explain everything about the shop, purpose, activities and many more
 
The purpose of this company to established is

  1. Aqua Design Amano (ADA) supplier
  2. Maintenance
  3. Design and installation of natural aqua
  4. Aqua decoration
  5. Retail sale aquarium
  6. Gardening tools accessories
  7. Providing a live food 
and many more to community.


Input that we gain from this shop :

  • There are 3 systems for aquascape which is marine, brackish and freshwater. The main system here is freshwater system.
  • There two elements that we need to put inside the aquarium which is soft ; aquatic plant and hard ; rock, bog wood , driftwood and many more.
  • After putting these two elements, the only thing to do here is put some aeration and wait the tank to be "matured" which is nitrogen cycle must had inside the tank with specific steps. This is because we bringing the nature from outside to inside for the fish and aquatic plant.
  • The benefits of doing aquascape is healthy hobby, appreciating the nature, save the organisms of outside from polluted and many more.
  • There are four types of designs of aquascape;

    1.    Iwagumi concept - it is a formation of rock
                                        - the origin of this concept is from Japan

    2.    Biotope concept   -Planted the elements besides of the water
                                        - The elements is being collected from nature

    3.     Dutch concept -the origin is from Germany
                                    - usually this concept is more to colourful concept to cheer the environment, aquascape lover or the tank itself

    4.      Nature concept  -  nature concept is like a "copycat" from their origin habitat

Many things that we learn from Mr.Izzat about aquascape like how to design it, what we need to put inside the tank, how many elements that we need to put based on the tank size, what type of organisms should put inside it and more. After he done giving the briefing, one of their staff shows us some demo about aquascape using a given element.


Picture 1 : This is the finishing of the demo of aquascape. The element that we need to put is a driftwood, any aquatic plant, aeration, some wire or sting to ligament the plant and some soil or fertilizer. Then wait about 3 week to make sure the tank is "matured" enough to sell and put a live organisms like fish inside  it.


After  finishing the demonstration, we take our time to tour the shop.


Picture 2 : The gardening tool or maintenance need for aquascape


Picture 3 : Various of food to feed the ornamental fish


It's been a great pleasure to visit one of the best branch in aquascape company.

Propogation of Aquatic Plant

Propogation of Aquatic Plant (Mesea  sp. )

Introduction

Propagation refers to the process of making more plants to keep a plant variety alive. Propagation is mainly done to improve plant health. Dividing a plant and replanting it stimulates new growth. Commonly, aquatic plants show two types of propagation. Vegetative propagation takes place when a part of the plant itself is used to propagate the plant.

Materials

Samples (Mesea sp), bottle with small screen covered on top, sterile distilled water, tween-20, Chlorox (70%, 50%, 30% and 10%), 70% ethanol, petri dish, Media ( Murashigae and Skoog agar), test tube.

Methodology

1.      The root and leaf was cut off from the plant.
2.      The plant is cut with length of 1cm each for 5 samples.
3.      The explants is washed with sterile distilled water with 2-3 drops of Tween-20 for 3 minutes
4.      The explants then been washed with 70%, 50%, 30% and 10% chlorox for 1 minute each.
5.      The explants then been rinsed with sterile distilled water.
6.      The explants is kept in the small bottle and brought to laminar flow.
7.      The explants then washed using 70% ethanol
8.      Put the explants on sterile tissue and cut the dead rhizomes
9.      Explants were planted into agar.


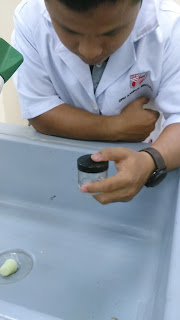
Picture 1 : Cutting the leaves or thallus of the sample


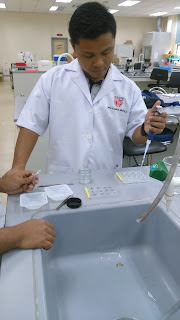
Picture 2 : The explants is washed with sterile distilled water with 2-3 drops of Tween-20 for 3 min


Picture 3 & 4 : The explants then been washed with 70%, 50%, 30% and 10% chlorox for 1 minute each.


Picture 5 : Cutting the dead rhizomes  inside laminar flow


Result :

Our sample had shown a negative result which is the plant didn't show any grow at a media inside a beaker.

Discussion :

Based on our result, all the cutting plant didn't grow any bud it because  plant is contaminate due to our inproper method during the cutting part inside the laminar flow . We didn't do it properly cause the bacteria to grow of the plant.  The contaminate plant also effect the media as well so the plant didn't receive any  benefits from media as a result both of them shows a negative affect.

Propogation of seaweed in Enrichment Media

Propagation of Seaweed in Enrichment Media

The species use in this experiment was Gracilaria changii. Three different media was use with three replicates. For our group, media that we used was B13, B14, B15 and B16.

Methodology

1.      Wash samples using tap water.
2.      Cut nine samples with measurement of 1cm.
3.      Weigh the samples one by one.
4.      Wash all samples with sterile water for about 30 second.
5.      Fill well plate with sterile seawater. (5ml)
6.      Add 104 CFU/ml of selected media (bacteria) to three samples with three replicates.
7.      Put samples in each well.
8.      Observation was done for 7 days.


Picture 1 :   Cut nine samples with measurement of 1cm.


Picture 2 : Wash all samples with sterile water for about 30 second.


Picture 3 : Put each sample inside the well with filled of water.


Picture 4 : Put 104 CFU/ml of selected media (bacteria) to three samples with three replicates.


Picture 5 : Three replicate of sample with bacteria as the media


Picture 6 : The weight of each sample


Picture 7 : The cuting seaweed in each well with sterile water


Result


Picture 8 : Some of the cutting show some bud


Discussion

Based on the result, some cutting of sample shows the growth of bud at the thallus. This shows that the thallus of sample had positive effect to interact with the bacteria media gives the rapidly grow of the thallus. However, some cutting of sample didn't show any reaction this is cause by the media which is contaminated. It slow the bacteria activity for the thallus of sample. Thus, the active bacteria will give  a positive effect to the growth of the seaweed even though it takes time but the effect of growth is low if the bacteria media is damaged or contaminated.

Propagation of Seagrass ( Thlassia hemprichii ) in Artificial Seawater

Propagation of Seagrass ( Thlassia hemprichii  ) in Artificial Seawater

Introduction
The samples were taken at Teluk Pelanduk and Teluk Keamang, Port Dickson, Negeri Sembilan. Each group have chosen one species of seagrass for their group. Our group species is Thlassia hemprichii The samples then were taken to laboratory with their originate substrate for culture.

Materials
Samples (nama species), aquarium, basket, white cloth, tooth pick, air stone and filtered seawater

Methodology
1.      Fill a aquarium with filtered seawater.
2.      A white cloth been placed on the bottom of the basket, then placed the substrate on the white cloth.
3.      Thlassia hemprichii were planted in the basket with tooth pick is placed on each node of the samples and air stones are fixed to maintain circulation in the aquarium.
4.      Aquarium is placed near the window for sunlight.
5.      Samples were observed weekly for their growth.

Trip to Teluk Kemang and KOMASS

Seagrass is  a marine angiosperm which belonging to four plant families which is Posidoniacea, Zosteraceae, Hydrocharitaceae and Cymodoceaceae. The function of seagrass to surrounding is, act as a food sources for fish and humans, as  a nest for a  fish to lay their eggs, keep the water clean, gives oxygen to surrounding and many more. Not only seagrass attached on the soil or mud, they also attached on the rope, rock an dother shell of invertebrate organisms. There is a big differences between seagrass and seaweed. The differences is in the following table :
Seagrass
Seaweed
Prostrate stem or extensive rhizomes
Prostrate axis or stolon, rarely extensive
Buried in the substrate
Above the substrate
Stem bearing leaves
Rachis bearing thallus
Leaves generally green
Thallus can be red, brown and green
Produce flowers, fruits and seeds
Produce sporangium and spores

In Malaysia, seagrass can be found in many places especially in Teluk Kemang, Merambong shoal and other places . Seagrass culture already exist a few years ago. Some species is easy to culture which doesn’t need frequent checking on them and some species is hard to culture which need to check it frequently to make sure it growth in healthy. There is a technique to culture these aquatic plants.

Today we’re going  to the place which had high diversity of seagrasses which is Teluk Kemang to  collected  some  samples to culture for each group. The instruction is  each group must collect different type of seagrass to culture in the laboratory. After we arrive , we being giving a briefing about our activities today.

 There are many types of species of seagrass that we found ar Teluk Kemang which is Halodule sp. , Halophila ovalis, Halophila becarii, Halophila spinulosa, Thalassia hemprecii, Gracilaria sp. , Sargassum sp. , Padina minor, Caulerpa racemosa, Cymodocea rotundata, Cymodocea serrulata and many more seagrass species in Teluk Kemang.

Besides collecting samples, we also must observe the ecology or diversity of the seagrass in that place. During our activities, our group had found some crabs and fish species in seagrasses area. This had approve that, the diversity of seagrass not only give the benefits to the plant itself also give other organisms benefit  for their survivor. 


                                  Picture 1 : The collecting sample area in Teluk Kemang


Picture 2 : One of our member group collecting the seagrass sample


 Picture 3 : Species that we selected for culture ( Thlassia hempricii)


Picture 4 : Putting some seagrass into aquarium tank.


Picture 5 : The pufferfish that had being found among seagrass (Line black and yellow)


After we’re done collecting samples in Teluk Kemang, our next destination is to KOMASS. In this place, we being asked to determine the domain species of aquatic plants that we found in that area. The domain species is Sargassum sp.

What we learn from our trip is we manage to observe the abundance of variety of seagrass and seaweed ; also we  observe the life form of seaweeds at the different region.For an example, some red seaweed like Gracillaria sp.  attached to other aquatic plant or  on the rock . Besides that, we also learn how to culture the seagrass in aquarium by determine the number of nodes for each weeks.


Tuesday, 27 October 2015

ISOLATION OF MICROALGAE

Practical 2

ISOLATION OF MICROALGAE

Introduction

Microalgae culture is so important have lot of benefit. But it is hard to have a pure culture of algae because there will be a lot of species in one culture. To have a single species culture, isolation of microalgae is needed. There is a few techniques to isolate a microalgae such as,

a)    Single cell isolation by using micropipette
b)    Streaking samples on agar plates
c)     Isolation by dilution

Material and methods

Single cell isolation by using micropipette

Materials: Culture Water, Bunsen burner, lighter, microscopic glass slide, Pasteur pipette, forceps, compound microscope


Methods:

1)    Pasture pipette is placed over the flame of the Bunsen burner.
2)    Using forceps, the tip of Pasteur pipette became soften and being pulled to make it longer and small hole.
3)    The ends of the pipette should be smooth to prevent it from destroying algae cell.
4)    The pipette was then connected to a rubber hose/tubing.
5)    A drop of sample was dropped on glass slide and was placed under the compound microscope, the micropipette was used to pick up cells different cells and then dropped on to the side of the glass slide.
6)    Finally, the single cell is transferred to the media in one of the well in a 96-well plate.


Figure 1: softening pasture pipette                   Figure 2: using micropipette isolation


Streaking samples on agar plates

Materials: f/2 agar plates, f/2+si agar plates, inoculation loop, Bunsen burner, centrifuge, Epperndorf tubes.

Methods:

1)    1 mL of sample was insert into an Epperndorf tube and being centrifuged at 5000rpm for 10minutes.
2)    Inoculation loop were sterile by putting the loop tip on the flame of Bunsen burner and let it cool down for 15 sec.
3)    The cell pellets at the bottom of Epperndorf tube were picked up with a inoculation loop and was streaked on the agar which is two type of agar, f/2 and f/2 + si.
4)    The plates were then incubated under room temperature with the presence of fluorescence light.
5)    Observation on the streaking plate being done after two weeks.


Figure 3 : Streaking sample on agar technique


Isolation by dilution

Materials: 10 test tubes, seawater, micropipette, stock culture

Methods:

1)    10 test tube being filled up with 9ml of water.
2)    Then 1ml of stock culture being inserted into test tube 1 and being mixed using micropipette.
3)    1ml of mixed culture in test tube 1 being transferred into test tube 2 and being repeated until test tube 10.
4)    The test tubes were then kept under room temperature and under the presence of light.
5)    The growth of algae was observed daily. It is indicated by the changing color of the media.

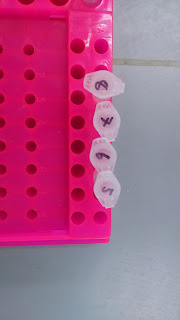
Figure 4 : Test tube use for isolation by dilution


Result

a)   Single cell isolation by using micropipette

None species was successfully being isolated using this method.

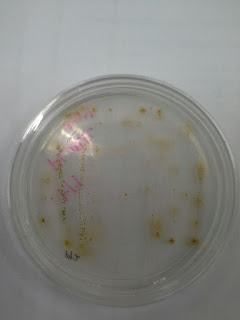
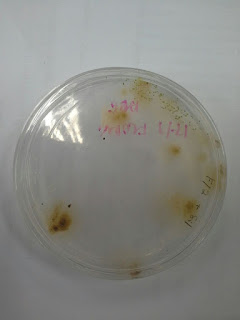
b)   Streaking samples on agar plates
c)   Isolation by dilution

This method was not successful because there is no bacteria growth.


Discussions

All method to isolate microalgae has their difficulty and successful rate. For single cell isolation using micropipette, high skill is needed to isolate one species of microalgae from one drop of water. Lot of time needed to search one cell of microalgae and will be difficult to isolate moving microalgae.
For streak plate method, this method is easy and can be practiced by everyone. But the result for streak plate method cannot be expected because of the sample that was taken might have several species or the agar plate being contaminated by other bacteria.
For dilution method, stock culture is needed because serial dilution is needed in this method. Dilution will be done for 10 times using 10 test tubes. Dilution is needed to decreased the number of microalgae cell in culture stock.


Monday, 26 October 2015

PREPARATION OF MEDIA

Practical 1

PREPARATION OF MEDIA


Algae media culture is known as an artificial environment in which let the algae growth. To make sure the algae growth in artificial medium there are a few important aspects need to being looking at such as nutrient's quantity and quality, light, pH, turbulance, salinity and temperature. In this experiment we used Von Stosch Enrichment (VSE). The following are their methods:

1. Firstly we take 4 conical flasks.
2. Each of them pour 500 ml deionized water.
3. Put different solutions in each flasks which is nitrogen, phosphate, iron and EDTA respectively.

Solution 1 : Nitrogen

Pour 1L of deionized water and put 26.75g Ammonium chloride (NH4 CL)

Solution 2 : Phosphate

Pour 1L of deionized water and sodium phosphate. dibasic , 12-hydrate and crystal with weight os 0.4g .

Solution 3 : Iron* (combine with 4 immediately prior to addition to seawater)

Pour 1L of deionized water and put 0.28 of Ferrous sulphate (FeSo4.7H2O)

Solution 4 : EDTA* (combine with 3 immediately prior to addition to seawater)

Pour 1L of deionized water and 3.72g disodium ethylenediamine tetra acetate (Na2EDTA)

4. After done putting the needed ingredients in each flasks , mixed them using a prepared machine.
5. Lastly, after done mixing, our 4 conical flasks combine with other 2 conical flasks that consists manganese and vitamins solutions.